Pages

Monday, August 19, 2013

I painted my countertops!

Yes - you read that right. I painted my counter tops and they look AWESOME! I had been eyeing the Giani Countertop paint for awhile and fell in love with the idea of their product and the amazing transformations they show on their site.  So I contacted them and they were SUPER AMAZING enough to send me a kit of my choice to test out and review for you all.
After a lot of thought - we chose the Sicilian Sands colorway. (that was our mistake - but more on that later)

We had to wait to try it out because our kitchen sink is VERY close to the back of the counter - so we had to take the sink out to make sure it would look as good as possible - this is by no means necessary and most people probably won't have this problem but it's an old kitchen and the sink was VERY poorly designed - so we figured to be safe we should take it out and do under where the sink would sit and then replace it and I am SO glad we did!

You can see in the picture below that there is a TEENY TINY SKINNY Little bit of counter behind the opening for the sink.  


So - I got the kit - read all the directions - watched the video (DO NOT SKIP THIS STEP AS IT'S SUPER HELPFUL and explains EXACTLY how you have to apply this stuff for the desired results)
I went to the store and bought the extra supplies needed to complete the project. (FROG tape, caulk, sandpaper, Brillo pads) 
My only complaint about this product is that I wish they would charge more but include all the extra things you need so that if you wanted to start the project as soon as you received it in the mail - you could - without having to go to the hardware store. If you have a hardware store nearby - it's no big deal - but it can be a bit of a downer if you don't know ahead of time that you need more stuff and then get upset that you have to go out to get more things to get ready.

I prepped the surface exactly as they said - with Brillo and cleaning it with water and a cloth. 
Then I started taping - and here is where I made my first mistake. We have these god awful silver edge thingies on our counters that don't all come off - and I didn't tape well enough to ensure that the paint didn't get on them at all - so around the edge it looks a little messy if you look close - but that was my fault and the fault of the person who chose the hideous silver edge thingies in the first place. 

The other issue we have is that our backsplash is ALSO formica and goes all the way up to the cabinets - so for now - they are still boring beige - until we find thin tiles to put over it as I'm afraid to take it all off for now. 

If we didn't have those design flaws I think the process would have been SEEMLESS - makes me wish I had a BIG island to test it on because it REALLY was super simple to do from A- D.

Here is a small section before and after all taped off and primed. Now in all the pics I've seen online the primer looks SUPER shiny back - so I don't know if I got an off batch or something - but it ended up looking flat black/greyish. I was tempted to put a second coat - but it didn't say to so I didn't do it just in case.


Here is a section that I had to  put some wood filler in to cover some small chips. (the brownish spots)

O.k. so I primed and it was already looking better with the black. I was very intimidated but once I started priming it was no big deal and I finished it all in like a half hour. I let that dry ALL DAY LONG and then got ready for step 2 which was the Minerals after the kids went to bed.

My husband and I worked together to sponge the minerals on and tried to be as consistent as possible. This part can be a bit scary as you are literally just sponge painting - so it would be nice if there was a part of the video that gave some visuals on how to achieve the different variations of color because we are not as crafty as we'd like to be and I think we kinda screwed up the sponging. In my head we should have covered all the blacky grey primer - which is what we tried to do at first - I also was afraid to add too much white cause I didn't really see how it fit in with the other 2 colors. (My artistic inability really came through here)

I will say that while you are sponging you need to take a step back every once in awhile because it looks different up close than from a few steps back. It looked better every time I stepped away a little bit. 

Now here is where WE made the mistake. Our counters were not a hideous seafoam green or pepto pink - they were just boring beige - and we ended up picking Sicilain Sands which is a beige granite look.
See the mistake? We didn't choose a color that was drastic enough to really have a WOW factor with the before and afters. Especially since our gross backsplash is still totally visible and you can see that the colors match up pretty well - I just feel like we jipped ourselves on a TOTAL WOW makeover and instead just updated the counters and made them look better.

Now, don't get me wrong - they look AMAZINGLY shiny and the colors look nice. I think we could have left a little more black like in all the videos they show and it would have looked a bit more drastic.

The edges are messy but that's my fault for not taping well and they are very specific that you take your time prepping and I suggest you do because you WON'T regret taping too much but you WILL regret not taping enough.

The counters came out amazing. The top coat was scary and I have a few streak marks but that's cause I am not the best painter in the world so my backroll needs some practice. We let the product dry overnight just to be sure and then installed the sink this morning.

The sink looks amazing with the counters (it's beige) and I can't get over how shiny they look. 
The product did everything it said it would. I found it to be easier than anticipated and just felt my artistic inability got in the way of making them even better. I'm sure if I had to do it again - I would be a much better artiste. ;)

I am nervous about them peeling - so we will try to be very careful to make sure we don't let water pool for extended periods of time but they look and feel amazing.


 With stuff back on them - see how shiny they are
 Here you can see the ugly backsplash against the counters - I bet when we fix that the counters will pop even more - we are thinking glass tile or something like that! Look at how shiny!

Close up of the edge.

Overall I think this is a no brainer for anyone who doesn't have the money to upgrade their counters and don't really NEED to. We didn't have to - our counters were fine - just boring and now they are NOT boring.  The test will be if it lasts as I've seen a FEW (not many) reviews that said it started to chip or peel but I get the sense those people didn't take care of the counters well. As we were doing the counters my husband asked when we were going to end up painting the cabinets (he knows me so well)
I am sure I will buy one of the Giani kits for painting cabinets but right now I am all DIY'd out and the idea of painting SO MANY CABINETS is just too daunting to me. Give me a month or so and I'm sure I will be telling you all about how we went out and got the kit and completed the kitchen transformation:)

I will try to find some better pictures of the before/after and post them later. 

Overall I would say - GO GET THIS AND TRY IT -  it's fun - but only if you are a little crafty as the painting takes some planning and precision. 
But I would definitely suggest that you go for a drastic change so that you feel like you're walking into a totally different kitchen. If  I had to pick again, I'd either go black/white or chocolate brown.
They have so many choices - it's hard to go wrong.

Wednesday, August 14, 2013

House updates!

Before (boring, blah walls - ugly cords hanging down)
 
After
SO MUCH BETTER!!!!
We painted the walls with an AMAZING color (peacock blue) - and then I took a box cutter and cut a hole behind the TV in the sheet rock and then again at the bottom of the wall to feed the cords through. I put an outlet cover at the bottom and need to finish that a little better - but for a last minute DIY - it works!!!

 Dining Room before and during colors


Here's a tip for painting - whatever color you like on the cute little paint chippy cards - go one shade lighter when you buy the paint or you'll be sorry. We went through a dark grey sample square (which we had to put 3 coats of primer over to cover up after realizing the cute light grey we picked out was a whole shade darker on the wall and dry) Then we tried a red orangey color - which looked awful - before finally deciding that Yellow would be our complimenting color to the living room Blue.

We picked a color out - and I had my doubts when I was ordering the gallon tha twe might want to go one shade lighter - but we pushed on and got the paint and brought it home.

The next day I started putting it on the walls and realized - yup - a whole shade darker at least than what I wanted. But you know what, this time it worked out because I'm starting to love it.

The whole point was to add bold color and I'm getting used to it now - so we were lucky this time - but Katie's room (below) is still WAY too dark for my liking because of the one shade darker thing - so next time I pick paint - I will go with my gut and go a shade lighter cause you can ALWAYS add more color later but it's very hard to take color away.

Trust me - You'll be glad you went one shade lighter.


 Ahhhh... there's a little life in here now.
 Looking from the living room into the dining room
(gotta update that light fixture - maybe for Christmas)
 Pinterest project - stair risers + contact paper = fun stairs
 Family Photos up the stairs (boring beige - we can change that next year sometime)
 Bens' Room!
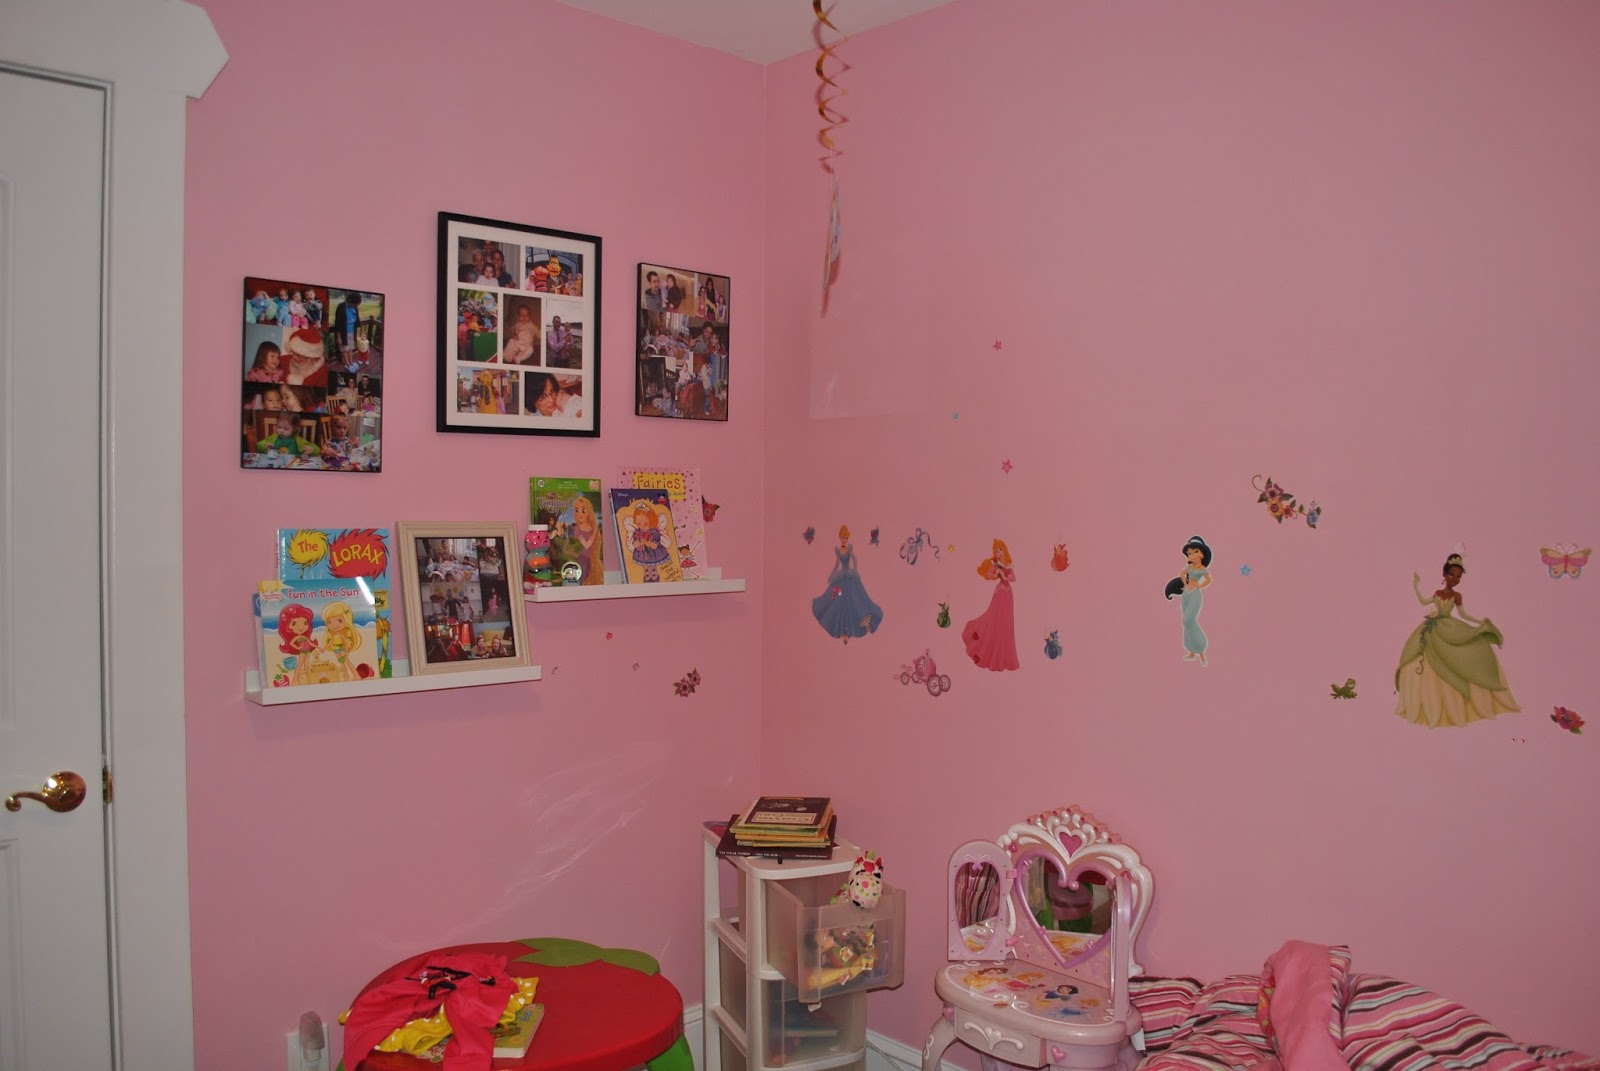
 Katie's Pink Pepto Bismol walls. (will need to break that up with something so it's not so PINK - maybe bead board on the bottoms???)
 Fun Kitchen artwork;)
Our next and final project for a while will be to update the counters using Giani Countertop paint. I'm not ready to invest in new counters - but I HATE THE boring beige blah ones we have now. (so much blah in this house before) So - faux stone it is. Only problem is we have to take the sink out again in order to do it right and make it look perfect -so that will have to wait until a date when we have the time and ability to cut it out again and flip it over upside down and be without a kitchen sink for a day or two - so hopefully next weekend - we can attack that and then just enjoy the house and all the personal updates we've done so far.

I still want to do the chalkboard wall for the kids - but that can wait at this point:)
DIY - Pinterest projects make me happy:)

Friday, August 9, 2013

My failed chalkboard project

I have a wall in my family room with a stained glass window in it. (All the houses around here have at least one stained glass window)

I have decided that is going to be our chalkboard wall - a place where the kids can just draw, doodle, write, and be creative all day, any day.

I bought chalk board paint at ACMoore with a 50% coupon (sweet right) and at first I was just going to go ahead and paint the wall - then I realized we might HATE the way the color looked permanently - so I decided to get a huge piece of plywood the entire length of the wall and then paint that with the chalkboard paint and then attach it to the wall.

This would allow us to take it down at some point and not be forced to repaint the whole family room to get rid of the chalkboard look. (We don't know the color of the walls since it was done before we moved in - so it's not like we can just re-paint the one wall)

So - I measure the wall - I go to Lowes. I talk to the nice man in lumber and we decide on plywood instead of MDF. (MDF would work but it was just too too heavy) I take the huge 4*8 foot piece of plywood - slam it on a cart - push said card through the store to the big saw and have a second nice man cut it down to size. I had measured the length of the wall and gave myself 2 options for height based on the stained glass window.

Now I have to put it in my car - it was about 95 degrees with 100% humidity and I had to take the car seats out - rearrange the seats and then put it up and over the seats meaning I couldn't use my rear view mirror. But I got it home.

Had to take the huge thing out of the car - get it inside the house and put it up against the wall - and realize the lights are flickering - why - because genius that I am  - I forgot there was a damn light switch about 6 inches BELOW the top of the height I had the plywood cut.

So yeah - now I had to drag the whole huge damn thing into the basement - put the car back together and go back to square one on my chalkboard wall. I will cut the plywood down to size to be centered on the wall and then make a cute little frame for it - except I don't have a saw.

So - the chalkboard wall will have to wait.

But it will be done - and my kids will probably play with it for about a day - but maybe they'll play with it more and think it's the coolest thing in the world!

Fingers crossed:)

Thursday, August 8, 2013

The kitchen sink project

So - our kitchen was the only room in the house that we knew we would have to do something with because it just hadn't been updated in a VERY LONG TIME.

We started with the appliances right when we moved in. We pulled out a 30 year old dishwasher and we replaced the refrigerator. In order to make the refrigerator fit - we had to alter the cabinets a little. (YAY FOR DADS WITH TOOLS) We thought that was as big of a project as we were going to do anytime soon.

Then I learned I was going to get the opportunity to write up a review for a product that transforms boring old Formica counter tops into faux stone looking things.

I'm not one to keep up with the Joneses - I don't feel the need to impress anyone with expensive updates in my house - I had no intention of replacing our countertops because they work just fine and we are busy with other things. I do however, love a challenge and a craft project and the Giani Countertop paint kit provides me with both!

So - our counters will LOOK a little snazzier (super plus) and they won't cost much money (SUPER SUPER PLUS) - it was Win Win.

With the impending face lift of the counters -  I got sick of looking at the gross faucet and yucky looking sink drain in our current sink. (which is actually a really nicely kept beige cast iron sink - that we worked into our facelift and intended to keep.)

So I hopped onto good old Google and tried to figure out how hard it would be to replace the sink drain and faucet. All looked easy enough - doesn't it always?

To make a long story short - it took a total of 6 separate trips to Lowes - a crapload of new tools and a little bit of cursing and elbow grease - but after 24 hours we had successfully replaced the sink drain - tail piece underneath the sink and faucet to update the sink.

We got to use a hack saw to cut through a horribly rusted on sink drain, to cut through the new tail piece we had to buy after realizing the old one was the wrong size. We got to take out a cast iron sink - flip it over and install a new faucet and then re-install the whole thing - and I now have an updated looking sink that is ready to be paired with the updated face lifted counters:)

This all makes me happy, happy happy.
Although - while the water was off, the tools were out and the project seemed doomed - I never thought we'd actually be able to do it - but we did. The hubby and I worked together and did it all ourselves and sometimes there is just no better feeling than that:)


 this sucker was NOT going to come off. Don't be alarmed - it's a combination of plumbers tape, paint and rust that you see - any drain that's been sitting 10 plus years probably looks the same underneath
 New sink drainer basket with plumbers putty waiting to be installed
 Naively thinking we were almost done

 Upside down cast iron sink (can you say heavy) with new dish soap dispenser and faucet installed upside down:)

I love for these types of projects and can't wait to get the counters done next AND THEN we will finish the first floor with finalizing our dining room with a little color and fun:)

Saturday, August 3, 2013

Katie Day

"Mommy, do you have to work late tonight?"
First thing she asked when I went into her room this morning after she woke up.
Broke my heart.

Good thing last night I decided today was going to be "Katie Day".

Things have been tough this last month - lots of late nights between Dave and I due to crazy busy work schedules - so the kids are constantly hearing how one of us has to work late and the other one will be on solo dinner duty that night.

Granted, working late in our house means home around 630 the latest for the most part - but for us - that's late - we're usually all home by 5:30 and are VERY VERY luck that our lives so far have allowed that.

So - back to the tough month - we've been working a lot. Ben is also very much 2 and quite a handful - so Katie kinda gets the shit end of the deal as the "older, more responsible, you know better than that child" We expect her to be more mature than her 4 years SHOULD allow and she steps up to the plate all the time. Ben ruins her tea parties, he distracts us, he pushes her buttons and our lives tend to revolve around making sure Benny isn't doing something wrong/bad/dangerous/mean.

And we take it out on Katie. And we know that's night fair. Every kid has their own stigma - oldest child, middle child, youngest child. You can't avoid it - I don't care what you say.

So - last night I decided she needed some extra attention. A day where we did what she wanted. 
I woke her up and after she asked me if I was working - I told her it was Katie Day - a day to do whatever she wants that we can realistically do. She chose to go to breakfast with Dave one on one and then to the dollar store to look for these marble things she's been asking for for about 2 months.
While she was there she got a bouncy ball from a vending machine.

They came home and she immediately asked if she could go back and get Benny a bouncy ball too.

We went back out and our first stop was the dollar store where she got Benny's bouncy ball - then we went to TJ Maxx to look for fun stuff and as usual she was a perfectly behaved child. She didn't get upset when I told her she couldn't buy ALL the stuff she wanted and she methodically traded things in until she settled on a horse purse stuffed animal thing and a new mini Princess doll. (she has been asking for this doll for about a year now.)

We then went to Walmart as I had a return and thought we could find stick on earrings for her there (one of her requests) - she stayed with me the whole time and listened and picked stuff out and helped me and then asked if we could go home to the boys. I explained that if we went home she would have to share and play with Ben and she said that was ok. 

So, we went home and the rest of the day was just as amazing. During Ben's nap - she and Dave hung out and played and watched a show - I went to the grocery store and got food and a special Katie Day Ocean Themed Cake. (they just happened to have them and they have been studying ocean animals in school lately so I thought it was perfect)

We ate cake, they played together - we shared - we stayed off the phones more than usual and then all went to the park and then let her stay up late to watch a show with just the 2 of us after Ben went to bed.

It was amazing. More days should be like Katie day - so from now on - we are going to do it by hour or groups of hours - some time we do what Ben wants and other times it's Katie's call  - we do this already - but I think we can do it better and everyone can get along better.

We need to disconnect from our phones and our work and get back to playing bouncy ball and eating donuts for snack time.

Katie's games are frustrating - we never know the rules and are always playing them wrong - but she loves it when we play with her and we need to let her be a kid. It's so hard when you have a kid that is so mature beyond her years that you start to just expect it all the time and you forget that she's 4 - and sometimes she just wants to have a tea party. 

So tea party it is.

Tonight we even stayed up after they went to bed and finished our household projects so we have more flexibility with them.

Every day is going to be a Ben/Katie day and the dishes will have to wait and the laundry will have to be folded later - and the emails from work that come in late will have to be ignored until the next day.

I am going to start going on internet black outs from when they get home until bedtime. I will post pics of them when they are doing awesome things because who can ignore that instinct, but I will do all the rest of it after they are in bed - even if it makes me tired. I have been trying to do this for awhile now and it's just so hard with the house now that I feel like there is SO MUCH more to do - but I can do it at lunchtime. It'll get clean and if not, no one will notice anyway;)

I'll drink an extra cup of coffee in the morning.

They both had such a nice day and I want that to be every weekend instead of the constant arguing, battling, territorial, grumpy, stressful times we've been having with them lately. We need to find more things they can do together and make them meet in the middle.

This is my promise for my kids. I will work harder to make you meet in the middle so that you aren't fighting all the time. I don't know how - but I will try my hardest to make you work together because obviously whenever we separate you you miss the other one.

From now on we can play bouncy ball. (which isn't really bouncy ball - you kind of are supposed to just sit there while she plays bouncy ball and tells you what else to do)

If I figure out how to win this game - I'll let you know.

Monday, July 22, 2013

Color makes me happy

I need color in my life. Bright, happy, bold, color.

We moved into our house and the walls has been painted a boring beige color and they looked good - so we thought we can live with this.

And we did, since April - but since I work from home and see these boring walls every day - I decided enough was enough and we went BOLD!!!!!!!!!!!


Peacock Blue was the color we picked and we love it!

We let the kids help us paint - which some people probably couldn't do - but we tried to have fun with it and show them how and then we figured we'd just paint over it and you know what, we all survived and the wall looks FINE!

We also have taken a "this is the kids house too" approach to our family room. I get that some people like to have formal rooms for sitting in - and that's great if that's for you.

We, however, bought a house to live in it. So, the back room in the house is the family room. The toys are back there and organized and the kids can not feel bad about playing or making a mess as long as we clean up afterwards. We are thinking of making a chalkboard wall back there for them too.
We let them play everywhere and there is no doubt that kids live here.

There are stickers on the walls. (Katie asked if she could put Tinkerbell on the wall and I realized - it wouldn't kill me and it would make her super happy - so we have Tinkerbell stickers on the wall)

There are streamers hanging up when there is no party planned.

There is a big piece of paper we leave hanging so the kids can just Draw on the walls. (this is why I want to add a chalkboard wall)


The living room is more of my room - with the peacock blue wall and couches I fought for during the house buying process. But even there - I have little baskets for their toys and a bookshelf that has some of their books on it.

They are little and they won't be little forever and I want them to feel comfortable in this house. I want this house to be played in and laughed in and to get a little messy sometimes.

So - now we begin the rest of the transformation we have to find all the finishing touches for the living room and then we can start  the dining room/kitchen make over.

I'm thinking some REALLY fun bright chevron pattern in the dining room and maybe subway tile backsplash or glass tiles for the kitchen.

Having our own house RULES and we are LOVING every minute of it:) There will always be time for us to make the house more formal later  - but for now - our house will be FUN!:)

After!!!

The next project will be to do the dining room. (seriously thinking Chevron or Damask stenciling) And then after that I am super excited that we have decided to do small updates to our kitchen.

The last room in the house will be our bedroom - but that's ok - I want to take my time with that. I'm thinking DIY Wooden Plank headboard.

Thanks for reading!

Thursday, June 13, 2013

An email to my parents

I know, I know. It's been a long time.

Hopefully you enjoy this one. The below is an email I sent my parents Tuesday night.  
 
The background is that Katie fell at school and and skinned her elbow. The school cleaned her up and put one of those super cheap, pale tan really big, really sticky band aids on her so we couldn't see how bad it was.
The next day, I cut away at the part that was NOT sticking to remove the gauze that was covering the injury - and realized that the gauze was STUCK to a pussy looking wound.....

which resulted in my husband having to rip said gauze off her elbow -  revealing a larger than we were expecting wound - and sent Katie into an absolute downward tailspin of screaming, tears and more screaming. (YOU HURTED ME, YOU REALLY HURTED ME BAD)

I grabbed the keys RUSHED to Rite Aid and bought 40 dollars worth of crap.(that is not an exaggeration - it was legit 40 bucks)  Non stick, non-sting, non-tape band aids, gauze, Bacitracin, Neosporin (the spray AND the cream) and a 6 dollar box of princess band aids.

I also got some chocolate covered cherries to cheer her up. We finally got that covered and put her to bed. She proceeded to walk around with her arm at a 90 degree angle for about 4 days after this.
(she never breaks character once she gets an injury)
 
About 5 days later she got a blister on her foot - prompting this email to my parents....
 
 ________________________________________
 
 
Katie got a blister
from her croc shoes outside
when she realized she had a blister - she tried to avoid taking a bath.

When she realized that wasn't possible, she started screaming bloody murder as soon as her foot hit the water.

which turned into me making her sit down in the water and hang her entire leg OVER the bathtub so I could clean her up.
Then I had to get her dry.
Apparently some water dripped on the blister
so i tried to dry it

that was wrong.

I got her on the bed - eliminated all water that could offend the blister and told her she needed a bandaid so it didn't hurt at night she said yes - then said she didn't need a bandaid - she changed her mind.
I got the bandaid - more bloody murder screaming. I finally told her I'd either put it on nicely or hold her down and do it because it had to be covered.

She eventually sat still and I slowly walked her through how she wasn't even going to know it was there.
i told her to close her eyes (she didn't)
Thanks to my cat like reflexes I was able to put the bandaid on with NO feeling from her - to which she started laughing through her tears and I kept telling her AGAIN how she needs to trust me because I take care of her.

She stopped crying - and then asked me to read to her.

I.Win.Again.

Oh and then Dave mentioned we should take off her elbow bandaid which she heard, so I gave him my best DAGGER eyes - more crying and screaming from Katie - I told her she could keep it on - I read her a book and now tomorrow we can look forward to her holding her arm like it's in a sling AND limping on one leg.
Joy.
XOXO I'm BEAT - This mommy shit is HARD

________________
Moral of the story

  • Have a STOCKED medicine cabinet (our first aid kit was FRESH out of neosporin and we had no non stick tape stuff) 
  • Learn which battles to pick with your child when it comes to injuries, band aids....
  • Get the non stick sticky stuff - it's like the stuff you use to wrap a sprain, only it sticks to itself instead of them
(She still has one piece of big, cheap ugly band aid stuck to her elbow but I was able to get ONE piece off by SOAKING it with baby oil last night

Goodluck parents everywhere!